Fluid art, also known as acrylic pouring, may seem very accessible at first, but there are certain things you should know before you get started. When I started, I also made some mistakes (I still do now and then, haha) and that's why I decided to create these fluid art tips.
What fluid art tips should you keep in mind?
1 – Watch videos and take notes.
That's how I started. Take a look at popular YouTube channels and study how you should mix the paints, what pouring mediums you can use, how to prepare the canvas, types of pouring, among much more. You can find many artists that show how they make their art and then you can adapt it for yourself, using the tips that you find most relevant. Pay attention to what the artists do, mainly, because they don't always say how they prepare or how to perform the techniques.
2 – Think before you execute.
When I started, I did things without thinking too much. It's funny to put the paint in a cup and then let it flow. However, it doesn't always work. If you want to develop your skills, you have to plan.
What colors will you use? What kind of pouring? Are you going to use the open cup technique or a funnel or another one? What will the base color be?
I'll tell you a mistake I made with a painting. I wanted to use the open cup technique and had never tried it before. So, I created the base, put the paint in the open cup and then when it was time to pass it across the board, the paint spread all over and covered the base I had made. My idea was to create a path through the canvas, and make the base visible. What happened here? I used an open cup that was too big, so I used a lot of paint and so it got all over it. It seems like a really silly mistake, but believe me, many mistakes like this happen when we don't think well about what we're going to do.
3 – Make sure you have all the materials available.
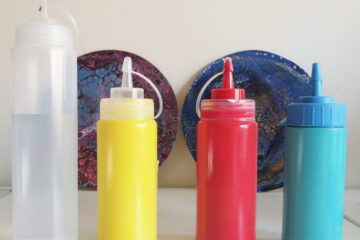
Don't be like me, who forget things and then go looking for them. Okay, now I don't do that much anymore, but at first it was a mess. Think carefully about what you are going to use and put everything close to you. The board, the paint, the pouring medium, water, painting knife, enough cups, paper towels (this is very important!), etc.
Bonus tip for this point: if you don't have your own studio and you have to store everything in your house, buy a cart with wheels, the kind you use in the kitchen. The cart I use has three shelves and I can store essential materials there.
4 – Don't be afraid to waste paint.
I still struggle with it. If you're a thrifty person who doesn't like waste, this tip is for you. Don't be afraid to put too much paint in the cups (but don't put too much either). I used to always use little paint and then I couldn't fill the frame well. Result: everything went wrong and I had to start again, wasting the paint, which was precisely what I wanted to avoid.
This tool by Olga Soby helps a lot to know how many millilitres of paint to use depending on the size of the board. Just enter the measurements and it tells you the millilitres needed.
5 – Choose the pouring medium.
Most artists use Liquitex or Floetrol medium. I use Marabu pouring medium, mixed with a little water. Basically, I put the paint in the cup, then some water and mix. Then I add the medium and mix again. I like this one from Marabu because it allows me to create some funny cells. You can also just use water if your budget is still low. The formula is as follows:
60% paint + 40% water
Or if you want to use my method with the Marabu medium:
60% paint + 10% water + 30% pouring medium
If you want to use only water, I highly recommend using the 60/40 formula, the margin of error will be very small. However, be careful, because depending on the brand of acrylic, it may not work very well. Amsterdam paints are very good to use only with water. You should also bear in mind that if you use too much water, the paint will break when it dries, so be careful.
As for the second formula, it is not so precise; I put approximate percentages. I have a habit of doing everything by eye, so I can already mix the paints without the help of a scale. Another note to take into account: this formula works, for me, with the Marabu brand. If you want to use another brand, test it first.
6 – Prepare the workspace.
Of all the fluid art tips, this is one of the most important, although it doesn't seem like it, especially if you work from home. In this type of art, the paint goes everywhere. Therefore, it is important to cover the work table well, as well as cover the floor with plastic. That way, if the paint falls to the floor, it won't get dirty; as for the table, it will be full of paint for sure.
Another important factor is dust. The area must be clean and dust free. Otherwise, as the canvas dries, the dust will cling and ruin a great job. Therefore, the ideal is to vacuum the place well before working.
7 – Take notes while you are doing your paintings.
This is one of the most essential fluid art tips. We all learn from our mistakes. Therefore, it is important to take notes of what went wrong, to correct, but also of what went well. That's how we learn.
8 - How to avoid those lumps? And the air bubbles?
Well, this is a nightmare for anyone who creates fluid art and I've gotten really frustrated with it. If you use floetrol or another pouring medium, the ideal is to filter the paint so that these lumps stay in the filter. When I mix it with water, this doesn't happen as much (that's why I use this method), but especially if you use floetrol, this can happen. It also happened to me when I only used the pouring medium, so I started mixing it with water too. As abstract as art is, nobody wants those lumps. If, however, you find lumps in the painting, you can easily remove them with a toothpick if it is still wet.
As for air bubbles, it's easier. You must have a torch; the heat of the torch will remove all the air bubbles and still help to create beautiful cells. But be careful, blow the torch quickly and not too much, otherwise you'll burn the paint.
It's also important to clean the canvas well before pouring the paint, as any dirt can cause unwanted bumps.
What if there are bumps when it is dry? Is it all lost? No! You can use sandpaper to remove these bumps. I recommend using 180 grit, because it's less abrasive and you won't notice the sandpaper effect on the frame as much. If necessary, make some adjustments with the brush over these areas, using the same color, of course, to disguise them. Then just varnish!
Tips for fluid art: BONUS
What if everything goes wrong?
Don't worry, no stress. If the board is all wrong, the important thing is that you learned. Try to understand what went wrong and what you need to improve for next time. All artists have already been at this stage.
Remember my failed attempt I mentioned above? As I saw that everything was wrong, I removed the paint with the painting knife, so that it would fall on the board, then I let it dry to create jewelry, taking advantage of the acrylic skin. Nothing is lost!
The process of creating fluid art has to be pleasurable and relaxing. If you're an anxious and stressed person, you won't be able to enjoy the process or learn well from the mistakes you've made. I speak for myself, I'm a little stressed and at first when things went wrong, I quickly demotivated. Don't let anxiety and demotivation gain ground. If you're still learning, mistakes are perfectly normal. In fact, mistakes are your greatest teachers, because from them you will learn how to do it.
Did you like these fluid art tips? With them, you can start getting to work!


3 Comments
Fátima Ponte · 12/06/2024 at 15:13
Hello
Does the canvas look glossy, satinised or matt once dry? Do you have any photos that show the surface in contrast to the light?
Thank you
Nádia Ferreira · 01/09/2024 at 10:38
Once dry, the canvas looks matt. It only looks shiny when I add varnish on top.
Nádia Ferreira · 01/09/2024 at 10:42
Não tenha medo de começar! Se quiser aprender melhor, pode seguir o meu canal no Youtube, onde mostro o processo de criação de alguns quadros. Acredite que vai dar certo! O importante é começar. Boa sorte! 🙂
Comments are closed.