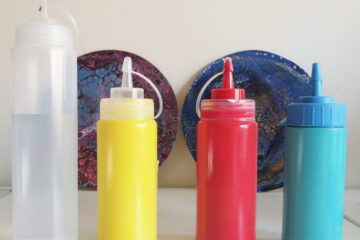
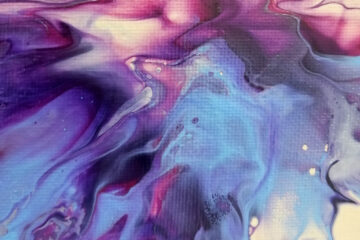
This type of art is really one of my favorites. To create fluid art, brushes are not used, but the fluidity of the paint. We will never know exactly how the work will turn out and that's why I find this art fascinating!
If you want to create fluid art, read the tips below first.
How to create fluid art?
1 – Choose the materials
First of all, you need to choose the right materials to create fluid art. Are you going to paint on canvas or wood? What paint will you use?
Dilute the paint
I have to mention that acrylic as sold cannot be used because it has a thicker consistency. For this, it is necessary to use a pouring medium to flow the paint. I use Marabu, but there are others you can try. One of the best-known brands is Liquitex. Just put the paint in a plastic cup, mix the pouring medium and it's ready to use!
Many artists also use floetrol, which helps a lot to dilute the paint, as well as helping to create fantastic cells!
However, for those who have less possibilities to invest, these mediums can become expensive…. The good news is that you can also dilute it with water! At first, I thought that by diluting the paint only with water it would break, but then I tried it and the results were good. I used 60% acrylic and 40% water. However, these values may change depending on the brand. I use Amsterdampaints, which have strong, beautiful colors and are not that expensive. Works great with just water! But be careful: if you add too much water, the paint will not adhere properly and will break.
Silicone oil
The use of silicone is optional, but it helps to create fluid art with beautiful designs. This additive prevents the colors from mixing and thus creates cells. Basically, it helps the paint to open by showing the color of the paint underneath. Just add a few drops to the paint (already diluted) before placing them on the canvas.
- If you use just a little (1-2 drops), the cells will be bigger;
- If you use more than 3 or 4 drops, the cells will be smaller.
2 – Organize your space
This point is very important. In fluid art the paint goes everywhere, that’s why it is necessary to protect the place well. I usually use floor covering paper to cover my work table, so the paint falls on the paper. But you can use plastic or other material to protect the surface.
Another important factor is cleanliness. The place where you are going to work must be clean, because if there is dust, it will stick to the paint and nobody wants that to happen. So, first of all, vacuum the floor, clean the table and other surfaces, so that there is no dust in the air.
3 – Organize the materials
After organizing the table, what materials will you use? I will give you a list of the ones I always need:
- Canvas (or other material you want to paint, for example wooden boards)
- Masking tape
- Plastic cups
- Acrylic paint (choose the colours you are going to use)
- Scale (optional)
- Pouring medium or water
- Paint spatula (optional)
- Hairdryer (optional)
- Something that raises the canvas, so that it is elevated. You can use cups. I usually use a tray with bars to place the canvas, so the paint falls inside of the tray.
So, how to use these materials to create fluid art?
- First of all, place the board (or other object of your choice) to raise the tray.
- Then, protect the back of the frame, otherwise it will all be covered in paint. With the masking tape, protect the back, so the paint won't spill and mess everything up.
- Dilute the paint in the plastic cups. I advise you to use plastic cups because it is possible to wash them and use again. Or, you can let the paint dry and it's easier to remove. I don't advise cardboard cups, because the paint will stick and then you can't reuse it. Of course, it is not mandatory to use plastic cups; you can use silicone cups, for example.
- To dilute the paint, you can use the scale, so that you can know the amounts of paint and pouring medium or water. If you dilute it with water, I really recommend using the scale, especially if you are a beginner.
- You will only use the paint spatula if you decide to create a base on the frame; it will help to cover the whole picture. The dryer is used to spread the colors across the frame, creating spectacular effects. However, you don't need to use the dryer if you don't want to create these effects. You can simply move the canvas until you cover the surface of the board. See the difference below.


If you want to know more about these and other techniques, read my post about acrylic pouring techniques..
4 - Drying time
When the work is finished, let it dry. As the paint is quite fluid, it can take between 3 to 7 days to completely dry. The canvas should be in a safe place, away from children and pets (and even curious adults who can put their fingers on the painting). Moreover, there can be no dust in the air. You can use a box or other utensil to protect the canvas from dust.
5 - Varnish
When the painting is dry, it's time to varnish. The varnish will help protect the painting, as well as giving it a shiny finishing touch. After applying the varnish, just wait a few hours for it to dry completely.
With these tips, you'll be able to create fluid art! The important thing is to start and take risks, test and try several times, to obtain more technique and create increasingly beautiful works.


4 Comments
Isabel · 27/01/2024 at 20:40
Gostei da dica uso floertrol e silicone mas não obtenho celulas de acordo com o que via eles punham 4 a 6 gotas vou experimentar com 1 obrigada
Nádia Ferreira · 01/09/2024 at 10:44
Também pode experimentar não juntar o floetrol com o silicone. Melhor explicando, nos meus quadros normalmente misturo apenas águas com a tinta acrílica e depois, quando pretendo obter células, é que coloco o óleo de silicone. Aí sim as células ficam bem.
Simone Barbosa Mantovani · 05/07/2024 at 19:06
O floetrol pode ser colocado em todas as tintas colorida, ou vai só no branco que derramamos sobre a tela?
Nádia Ferreira · 01/09/2024 at 10:33
O floetrol pode colocar em todas as tintas coloridas 🙂
Comments are closed.